Plumbing problems can be a major headache for homeowners, and they often seem to crop up at the most inconvenient times. From leaky faucets to clogged drains, plumbing issues can be a nuisance and potentially cause significant damage to your property. However, with some basic knowledge and the right tools, you can resolve many common plumbing issues without calling in a professional.
In this blog post, we’ll cover eight of the most common plumbing issues that homeowners face and provide step-by-step instructions for fixing them. Whether you’re a seasoned DIYer or just looking to save money on HVAC and home repairs, read on to learn how to tackle these common plumbing issues like a pro.
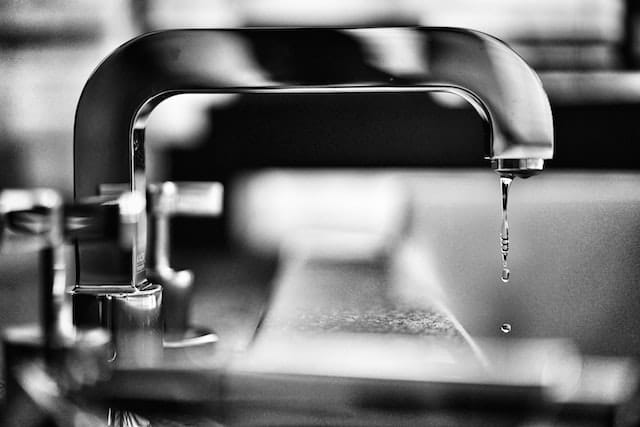
1. Leaky Faucets
First, turn off the water supply to the faucet. This can typically be done by shutting off the valve under the sink. Next, remove the handle on the faucet to expose the cartridge or stem assembly. This may require using a screwdriver or an Allen wrench.
Inspect the cartridge or stem assembly for any signs of wear and tear, such as cracks, scratches, or corrosion. If you notice any damage, replace the cartridge or stem assembly. You can find replacement parts at your local hardware or plumbing supply store.
If the cartridge or stem assembly is in good condition, the problem may be a worn-out washer. To replace the washer, remove the old washer from the assembly and replace it with a new one of the same size and shape. Reassemble the faucet, turn the water supply back on, and test the faucet for leaks.
If the faucet continues to leak, the issue may be a damaged seal. In this case, you’ll need to replace the entire faucet. While this is a more involved process than replacing a washer or cartridge, it’s still something that many homeowners can do themselves with a bit of patience and the right tools.
2. Clogged Drains
The first step to fixing a clogged drain is using a plunger. Ensure enough water is in the sink or tub to cover the plunger, and then use a few forceful pumps to dislodge the blockage. If that doesn’t work, you can use a drain snake or auger to remove the obstruction.
You may need to use a chemical drain cleaner. However, be aware that these products can be harsh and may cause damage to your pipes over time. If you do use a chemical drain cleaner, be sure to follow the manufacturer’s instructions carefully and take appropriate safety precautions.
You can take several steps to prevent clogged drains from occurring in the first place. First, avoid pouring grease or oil down your sink or drain, which can harden and cause blockages. Second, use a hair catcher or drain cover to catch hair and other debris before it goes down the drain. Finally, consider having your pipes professionally cleaned regularly to remove any buildup and keep your plumbing running smoothly.
3. Running Toilets
To stop a toilet from running, the first step is to locate the source of the problem. Lift the tank lid and inspect the flapper and fill valve. If the flapper is worn or damaged, it may need to be replaced. To accomplish this, turn off the water supply to the toilet, flush the toilet to drain the tank, remove the old flapper, and install a new one.
The fill valve may be the culprit if the flapper is not the concern. This valve is responsible for regulating the water level in the tank. If it’s not functioning properly, the toilet may continue to run even after it’s flushed. You may need to adjust the float or replace the valve assembly to fix the fill valve.
In some cases, a running toilet may be caused by a difficulty with the overflow tube or the flush handle. If the overflow tube is too short, it can cause the water to overflow and continue running. Similarly, a loose or damaged flush handle can prevent the toilet from flushing correctly and lead to a running toilet.
4. Low Water Pressure
To fix low water pressure, you must first identify the source of the problem. If the issue is isolated to one faucet or fixture, such as a shower head or sink, the case may be a clogged aerator or shower head. To fix this, simply remove the aerator or shower head and clean any debris or mineral buildup that may be blocking the flow of water.
Another common cause of low water pressure is a faulty pressure regulator. This device is responsible for regulating the pressure of the water coming into your home, and if it’s not functioning properly, it can lead to low water pressure. To fix this, you may need to replace the pressure regulator or have it adjusted by a professional plumber.
Low water pressure may sometimes be a symptom of a more serious plumbing issue, such as a leak or burst pipe. If you suspect this is the case, calling a plumber as soon as possible is essential to avoid water damage or other costly problems.
5. Faulty Water Heater
To repair a broken water heater, the first step is to identify the source of the problem. The issue may be with the heating element or thermostat if you’re experiencing no hot water or inconsistent water temperature. In this case, you may need to replace the faulty component or have it repaired by a professional plumber.
If you notice leaks or signs of rust around your water heater, the concern may be a leaky tank. This can be caused by corrosion or damage to the tank, and in some cases, the only solution may be to replace the entire unit.
Another common issue with water heaters is a buildup of sediment or mineral deposits in the tank. This can cause your water heater to become less efficient and can also lead to leaks or other issues. To fix this, you may need to drain and flush the tank to remove any sediment buildup.
In some cases, a faulty water heater may be due to a problem with the gas or electrical supply. If you’re unsure how to troubleshoot these issues, it’s best to call a professional plumber to diagnose and repair them.
6. Burst Pipes
If you suspect that you have a burst pipe, the first step is to turn off your water supply to prevent further damage. Next, it’s crucial to identify the location of the burst pipe. You can do this by checking for any visible signs of water damage, such as wet spots on the walls or ceiling, or by listening for the sound of running water.
Once you’ve located the burst pipe, you can temporarily resolve the issue by applying a patch or using a compression fitting. However, it’s essential to note that these temporary fixes are not long-term solutions and may not be sufficient to prevent further leaks or bursts in the future.
To permanently fix a burst pipe, you may need to replace the damaged section of pipe or even the entire plumbing system. This can be a complex and time-consuming process, and hiring a professional plumber is indispensable to ensure the repair is done correctly and safely.
To prevent burst pipes from occurring in the future, homeowners can take a few preventative measures, such as insulating pipes in cold areas of the home, maintaining a consistent temperature in the home during the winter months, and having their plumbing system inspected regularly by a professional plumber.
7. Sewer System Backup
If you suspect you have a sewer system backup, it’s important to act quickly to prevent further damage and health hazards. The first step is to turn off the water supply to your home and avoid using any plumbing fixtures until the issue has been resolved. Next, it’s critical to call a professional plumber to assess the situation and determine the best course of action.
To fix a sewer system backup, a professional plumber may use a variety of methods, including snaking the sewer line to remove any obstructions, using hydro jetting to blast away buildup and debris, or even replacing damaged sections of the sewer line. In some cases, a plumber may also recommend preventative measures, such as regular sewer line inspections or installing a backflow preventer to avoid future backups.
It’s essential to note that sewer system backups can pose a health hazard to you and your family due to the potential presence of harmful bacteria and pathogens in the wastewater. If you suspect you have a sewer system backup, it’s important to avoid contact with any wastewater and call a professional plumber immediately.
8. Dripping Shower Heads
To fix a dripping shower head, the first step is to turn off the water supply to the shower. Next, remove the shower head and inspect it for any visible signs of damage or wear. If the shower head is in good condition, the issue may be caused by a worn-out washer or seal, which can be easily replaced.
To replace the washer or seal, you will need to disassemble the shower head and remove the old washer or seal. Take the old washer or seal to a hardware store to ensure you get the correct size and type of replacement. Install the new washer or seal in the shower head and reassemble it.
If replacing the washer or seal does not resolve the issue, the problem may be with the valve, which will require a professional plumber to replace. A professional plumber will be able to assess the situation and determine the best course of action to fix the dripping shower head.
To prevent dripping shower heads from occurring in the future, homeowners can take preventative measures, such as cleaning and maintaining the shower head regularly and replacing worn-out washers or seals as needed. Additionally, investing in a high-quality shower head can help reduce the risk of leaks and drips.
In conclusion, these 8 common plumbing issues can be frustrating and even cause damage to your home. However, by understanding the causes and solutions for these problems, homeowners can take the necessary steps to prevent and fix them.