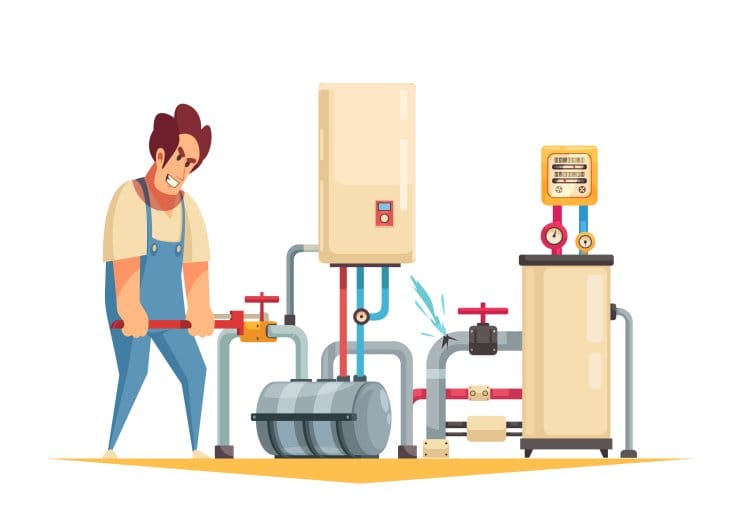
Picture this: It’s a chilly morning, and you’re ready to start your day with a warm, invigorating shower. But, horror of horrors, your water heater decides to take a vacation, leaving you with nothing but icy water! Before you panic or call an expensive repair service, take a deep breath. In this article, we’ll share five easy water heater repair do-it-yourself (DIY) tricks to fix your water heater and save you hundreds of dollars. So, let’s dive in and restore the cozy warmth to your showers!
1. Check the Power Supply:
Power Problems Might Be the Culprit
First, is your water heater receiving the power it needs to function properly? It might sound obvious, but sometimes the simplest solutions are the most effective. Check if the power supply to your water heater is working. Start by verifying if it’s plugged in securely and the circuit breaker hasn’t tripped. A power outage or a flipped breaker can easily disrupt the electrical connection and leave you shivering.
If you find the breaker has tripped, don’t sweat it! Just flip it back on and see if the water heater springs back to life. But what if it keeps tripping? That could indicate a more significant electrical issue, and it’s time to call in a professional. Safety first, after all!
2. Inspect the Pilot Light:
Shedding Light on a Common Problem: The Pilot Light
Ah, the mysterious pilot light. It’s a small flame that plays a big role in your water heater’s performance. If the pilot light goes out, your water heater won’t heat the water. It’s like a chef without a flame – nothing gets cooked!
To solve this issue, locate the pilot light. It’s usually found near the bottom of the water heater. Check if the flame is lit. If not, don’t worry; relighting it is a breeze. Follow these simple steps:
- Turn the gas control valve to the “Off” position and wait for five minutes.
- Locate the pilot light and turn the gas control valve to the “Pilot” position.
- Press and hold down the reset button or ignition switch.
- While holding the button down, use a long lighter or match to ignite the pilot light.
- Continue holding the button for about a minute to ensure the flame remains lit.
- Finally, release the button and turn the gas control valve to the “On” position.
Voila! Your pilot light should be shining brightly, and your water heater back in business.
3. Flush the Tank:
Dirty Secrets: Flushing the Tank to Banish Sediment Build-up
Over time, sediment can accumulate in your water heater tank, causing a variety of issues. It can reduce efficiency, decrease the water heater’s lifespan, and even create strange noises. So, it’s time to roll up your sleeves and give that tank a good flushing!
Here’s how you can do it:
- Turn off the power supply to your water heater.
- Connect a garden hose to the drain valve located near the bottom of the tank.
- Place the other end of the hose in a floor drain or outside, ensuring a safe drainage path.
- Open the pressure relief valve and then turn on the drain valve.
- Let the water flow until it runs clear, indicating that most of the sediment has been flushed out.
- Close the drain valve and pressure relief valve, remove the hose, and turn on the water supply.
- Once the tank is filled, restore power to the water heater.
By regularly flushing your water heater tank, you’ll extend its lifespan, improve its efficiency, and bid farewell to those strange rumbling noises.
4. Replace the Heating Element:
When the Heat Fades: Rekindling Your Water Heater’s Performance
Is your water not getting as hot as it used to? It could be due to a faulty heating element. The heating element is responsible for, well, heating the water. Over time, it can wear out and require replacement. But fret not! This is a task you can handle on your own.
Before you embark on the replacement journey, turn off the power supply to the water heater and drain the tank. Then, locate the heating element access panel on the side of the water heater. Remove the panel and use a multimeter to test the heating element for continuity. If it’s defective, purchase a new heating element compatible with your water heater model and install it according to the manufacturer’s instructions.
With a fresh heating element in place, your water heater will be firing on all cylinders and delivering the toasty showers you crave.
5. Insulate Your Water Heater:
Insulating Your Water Heater for Optimal Efficiency
Did you know insulating your water heater can help retain heat, reduce energy consumption, and lower utility bills? It’s like wrapping your water heater in a cozy blanket for added warmth! Plus, it’s a simple DIY project that requires minimal effort.
Start by purchasing a water heater insulation blanket from your local hardware store. Ensure it’s designed for your specific water heater type. Then, follow the manufacturer’s instructions to wrap the blanket snugly around your water heater, leaving openings for controls, valves, and other necessary components.
This insulation will keep the water warmer for longer and prevent heat loss, helping your water heater operate more efficiently and saving you some hard-earned cash in the process.
Congratulations! You’ve just become a DIY water heater hero!
By following these five easy tricks, you can fix common water heater issues and save yourself hundreds of dollars in repair costs. From checking the power supply and relighting the pilot light to flushing the tank, replacing the heating element, and insulating your water heater, you now have the knowledge and skills to tackle these problems head-on.
Remember, safety should always be your top priority. If at any point you feel unsure or uncomfortable performing any of these tasks, don’t hesitate to call a professional plumber. They have the expertise to handle more complex issues and ensure your water heater is in tip-top shape.
So, say goodbye to cold showers and hello to a warm, comfortable bathing experience. Your water heater will thank you, and so will your wallet!